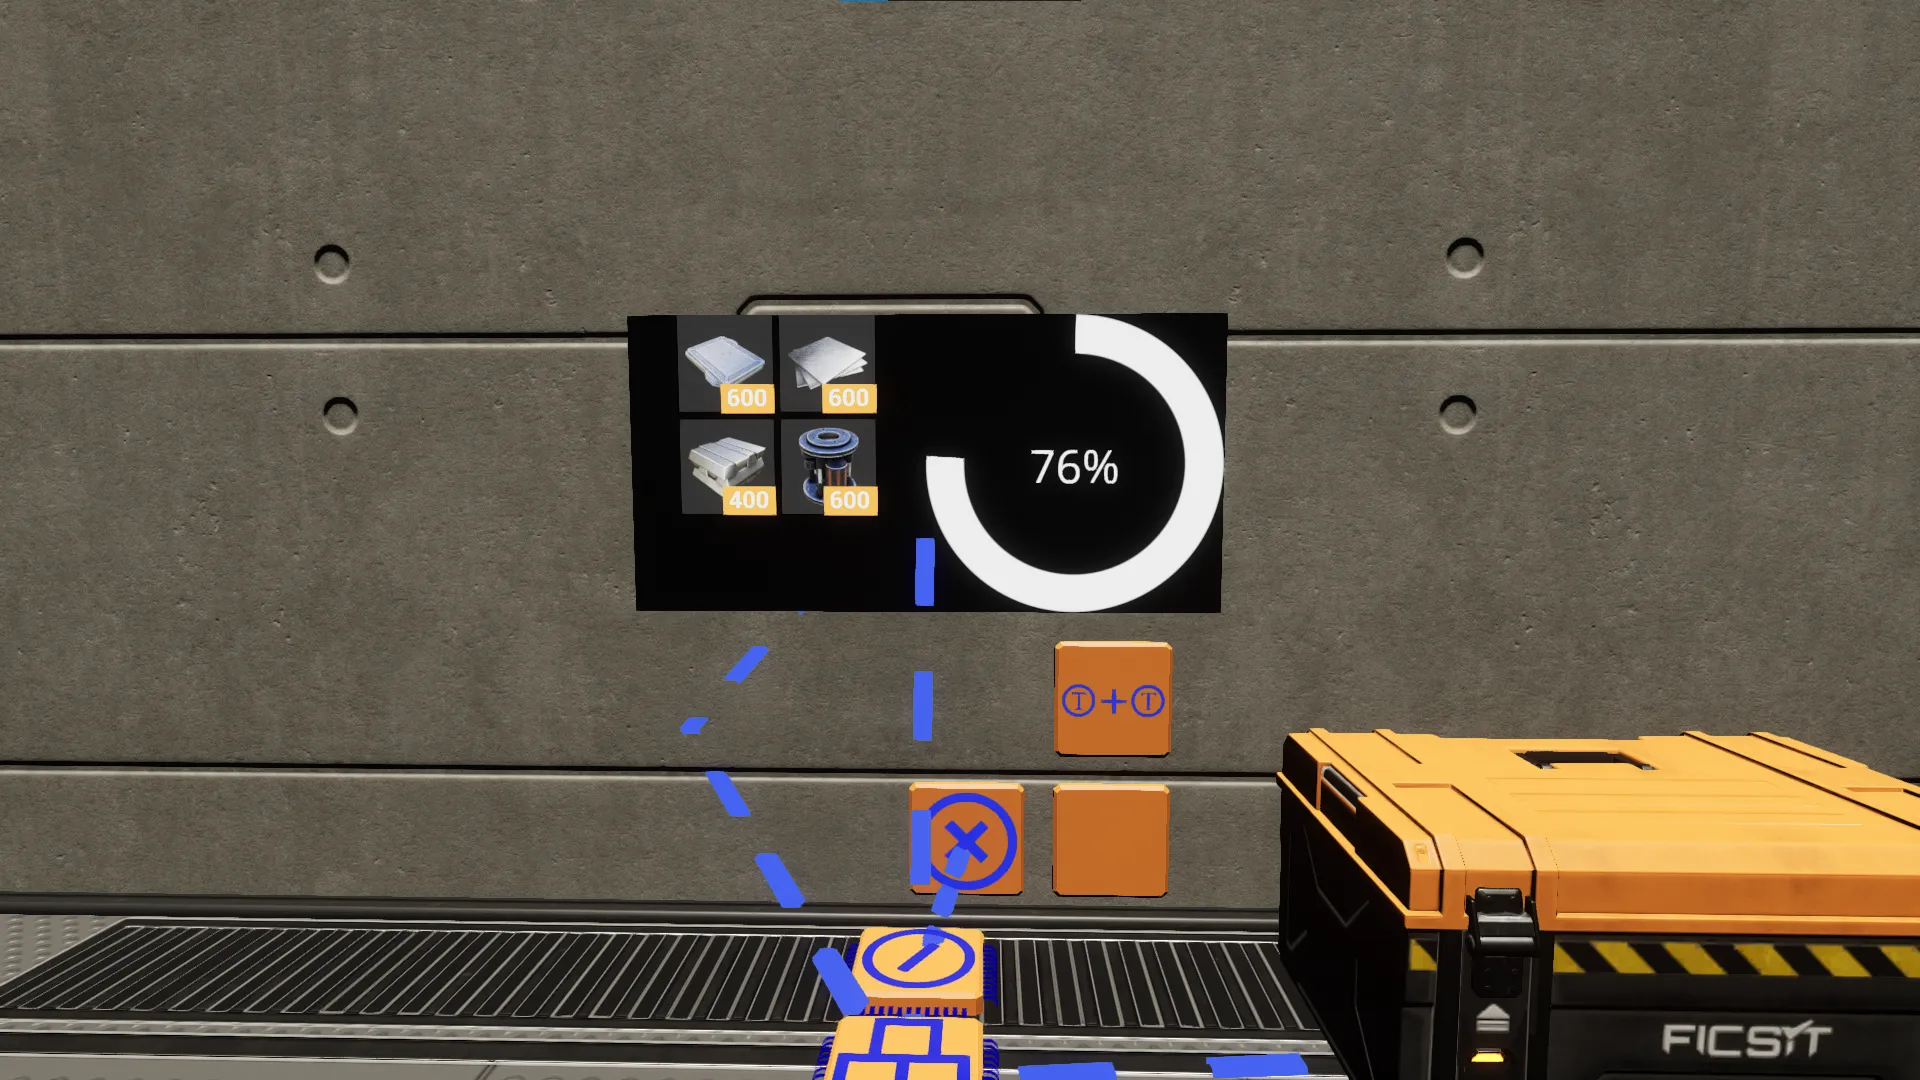
Advanced Signs
Circuitry has custom signs, similar to RSS but much better and designed to work with circuitry data directly - allowing more control over the sign's components.
What with RSS signs would require 10-15 minutes of just setup, only takes 30-40 seconds to fully configure with circuitry.
What with RSS signs would require 10-15 minutes of just setup, only takes 30-40 seconds to fully configure with circuitry.
Starting with advanced signs
Advanced signs are not any harder than RSS signs, you just place them down and they work as you configure them to.
Signs can be found in the IO category of the mod, under "Advanced Signs" section.
Currently only vanilla sign sizes are available, however there will be more custom sign sizes once all important features are added!
Place your sign and interact with it to open the interface.
Signs can be found in the IO category of the mod, under "Advanced Signs" section.
Currently only vanilla sign sizes are available, however there will be more custom sign sizes once all important features are added!
Place your sign and interact with it to open the interface.
Interface
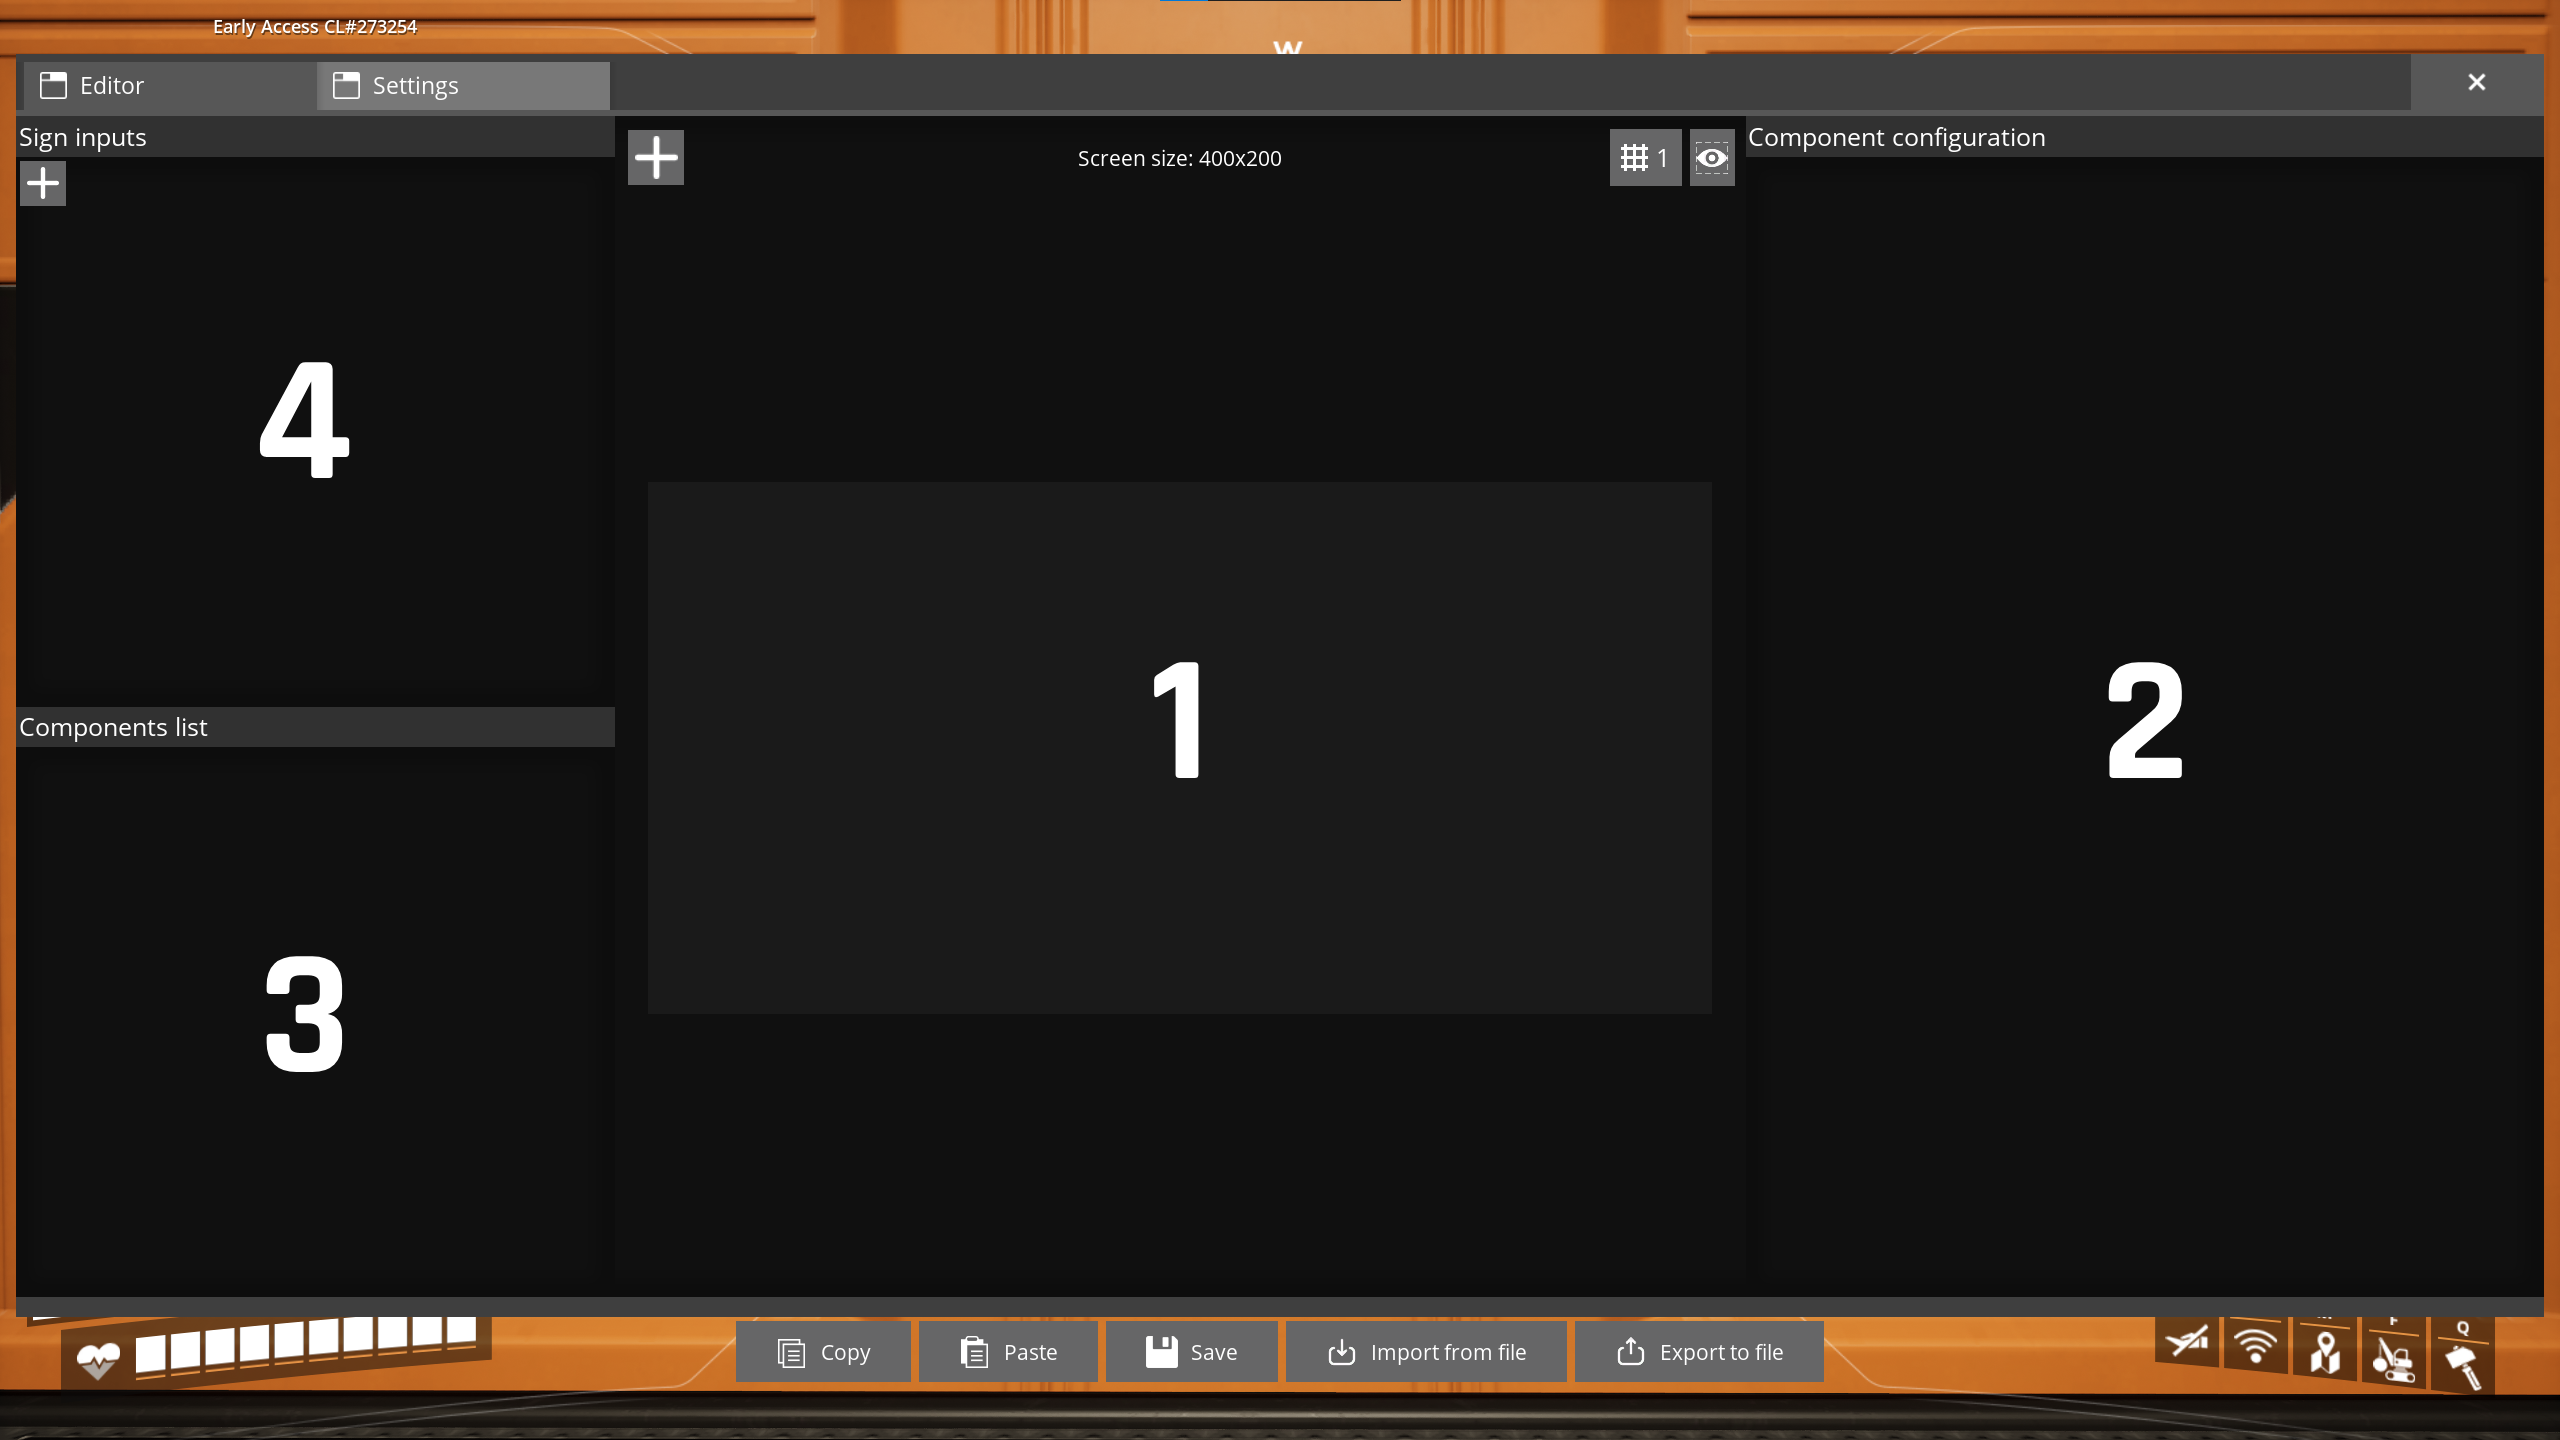
When you first open the interface, this what you will see.


-
[1] The main interface
This is the sign's preview window and the place from which you will add components to the sign. -
[2] The component configuration
This window will display component's variables that you can edit to your liking.
Variables can vary in types, functionality, and even the ability to be bound to some input on the sign itself
-
[3] Components list
Shows all components currently placed on the sign.
You can use this to interact with components that are hidden behind some other component
-
[4] The sign inputs
This is the window that controls what inputs your sign has.
Inputs can be used to dynamically change component data (i.e. change text on the sign, change color of some component, etc.)
Components
Components are elements of the sign, such as text, image, background, etc.
To add a component click on the + in the top left corner of the main window
We'll start with something simple - just plain text component
Once you've created it, you will notice that there's a lot of stuff in the component configuration window on the right.
Different components will have different variables that you can configure.
Since we're looking at text, the most important variable for us is the actual text that is displayed.
Here's how to change it:
Once you exit the interface using ESC or the X on the main window, you will see that the sign is now displaying the text we set!
Note: Do NOT use TAB - the game will delete all your changes on the sign without saving!
Changing text on the fly - variable bindings
Now, static text is cool and all, but this is circuitry, and we all would like to have a way to dynamically change the text depending on some condition.
Simple! Using variable bindings, we can change most of our component's variables at any time.
Note that not all variables can use bindings - some of them are quite expensive on your computer, or outright broken when changed quickly, so those variables are constant only.
Let's bind our text to some input on the sign.
That was one way to bind variables.
Remember that variables just like outputs can be used multiple times - you can have multiple texts synced with each other, or multiple images rotating in sync!
Here's another way to bind variables: Remember that there's a lot LOT more you can do with bindings than just changing text - there are components that allow you to make a filling bar that could for example show how full is your inventory!

Sign component folders
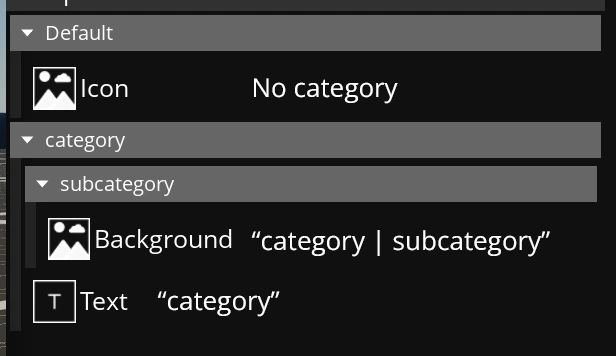
You can organize your components into categories
Category is set in component configuration
You can nest categories up to 5 levels.
To create a subcategory, you need to use the | symbol.
For example to have a category called "a" and inside it a category "b", you would need to set the component category to a | b
Category is set in component configuration

You can nest categories up to 5 levels.
To create a subcategory, you need to use the | symbol.
For example to have a category called "a" and inside it a category "b", you would need to set the component category to a | b

Context menus
Context menus are special menus that you can open by right clicking on an element
They differ in contents, depending on the element.
For example "background" component cannot be moved around, so it doesn't have any position or size actions in its context menu
Image, on the other hand, can be moved around and resized - so it has both of those action categories in the context menu. Context menus might also have some subcategories - actions with an arrow next to them will open more actions.
Note that some don't necessarily require you to select a sub-action, sometimes you can click on subcategory (action) itself.
They differ in contents, depending on the element.
For example "background" component cannot be moved around, so it doesn't have any position or size actions in its context menu
Image, on the other hand, can be moved around and resized - so it has both of those action categories in the context menu.
 Context menus might also have some subcategories - actions with an arrow next to them will open more actions.
Note that some don't necessarily require you to select a sub-action, sometimes you can click on subcategory (action) itself.
Other settings
Signs have additional settings that might help you achieve what you want with them
To access these settings, select "Settings" tab on top of the main window
As of right now, these are the settings available:

To access these settings, select "Settings" tab on top of the main window
As of right now, these are the settings available:
-
Sign DPI
Allows you to control the resolution of the sign.
Higher resolution - more readable elements become. This can help with reading small text, but might impact performance if used in very large quantities (200+)
Use with care. -
Emission level
Similar to vanilla signs, allows the user to control how bright the sign appears for everyone.
Note that this does not mean the sign will emit any light that reflects off the surfaces, but Lumen technology might help it look more realistic -
Updates/s (Tickrate)
Controls how often the components get updated.
If you want the sign to rarely update (i.e. making an improvised player radar for fun) you can set it to 1 or even fractional values like 0.1 (one update every 10 seconds)
During the time the sign is inactive, it will not attempt to read any data from inputs, which significantly improves performance

Sharing layouts
Update v12.90 introduced new feature to advanced signs - layout sharing
You can now export your sign layout to a hard drive to then share it with other users.
We have a channel in our server for that if you are interested! [CLICK ME]
Exporting
Exporting layouts is very simple - click on "Export to file" button in the sign editor.
You will be prompted to save your changes if you had any, if you click "Abandon" then currently applied layout will be exported instead of what you see in editor.
After that a window will pop up, give your layout file a name. Click on "Open folder" button so you can access the layout files folder faster, then click "confirm" to export the layout.
Importing
Importing is just as easy - click on "Import from file", select your file and that's it.
If your file was corrupted in some way, you will receive an error
You might receive a warning that the layout is made for a different sign, but you can still attempt to load it.
In some cases the layout will apply just fine, in other it might look odd.